Embedding products in blog posts is key for cross-selling and showcasing related items, aiming for a superior customer experience with context-specific purchase suggestions, and promoting increased sales.
Incorporating product links in blog articles can also boost SEO performance for your product pages. Such internal links clarify the connection between your blog and product pages, aiding search engines in comprehending your website's structure and relationships.
Create custom HTML code to display product details
Using custom HTML code, you can uniquely display product details in your blog posts, dynamically enhancing user engagement and potentially boosting conversions.
- Replace the HTML below with the product properties. You need to replace:-
- Product Name
- product-image URL and
- product-image-description- Product Description
product-url<div class="product-details"> <h3>Product Name</h3> <img src="product-image-url" alt="product-image-description"> <p>Product Description</p> <a href="product-url">View Product</a> </div>
- Insert your custom HTML in Storipress.
Congratulations! You have successfully used custom HTML code to display product details in your Storipress blog post.
Embed products using the Shopify’s Buy Button
The Shopify Buy Button lets you embed products into your blog posts for a smooth shopping experience. Its integration enables product display, add-to-cart feature, and checkout options within your content.
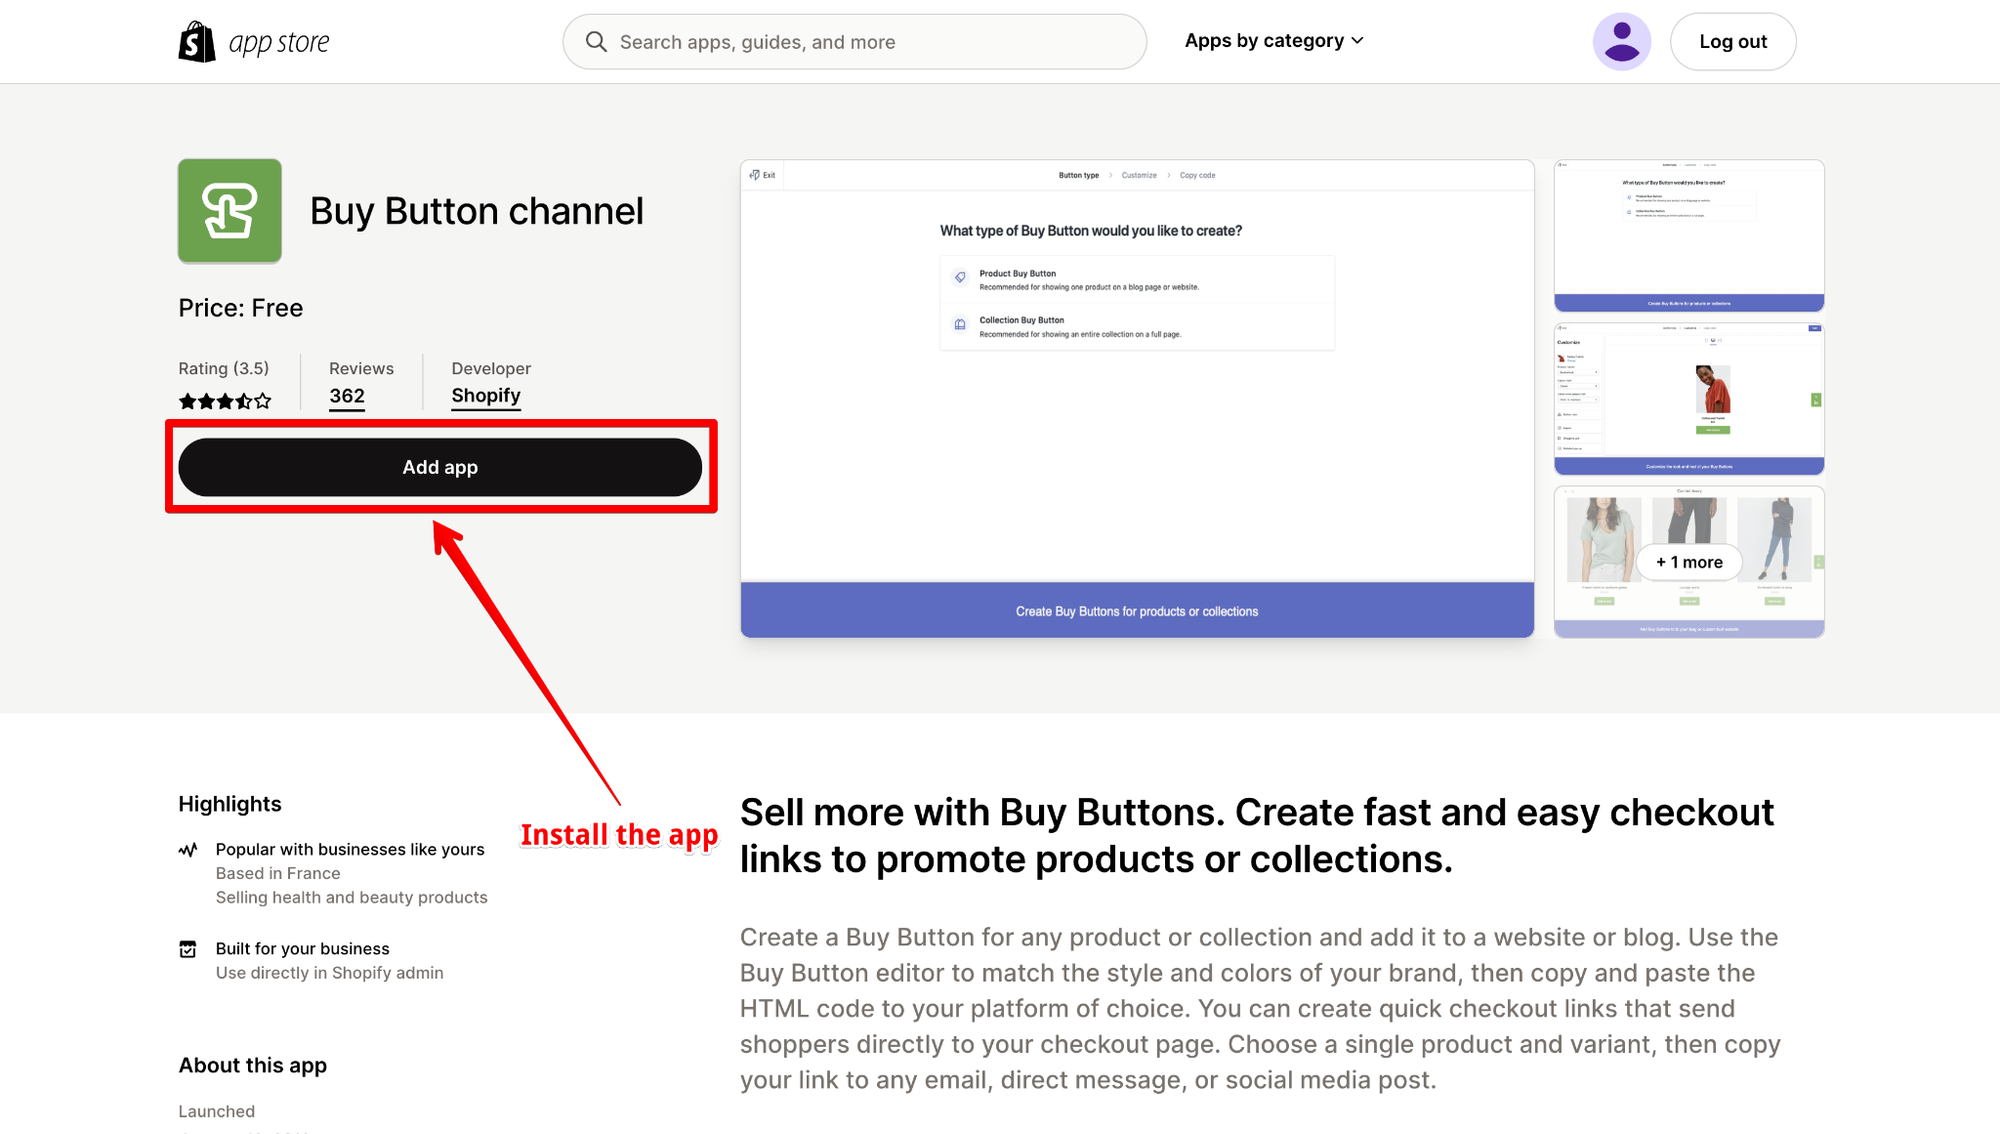
- Install the Buy Button app on the Shopify app store.
- Click on “Create a Buy Button”
- Choose “Product Buy Button”
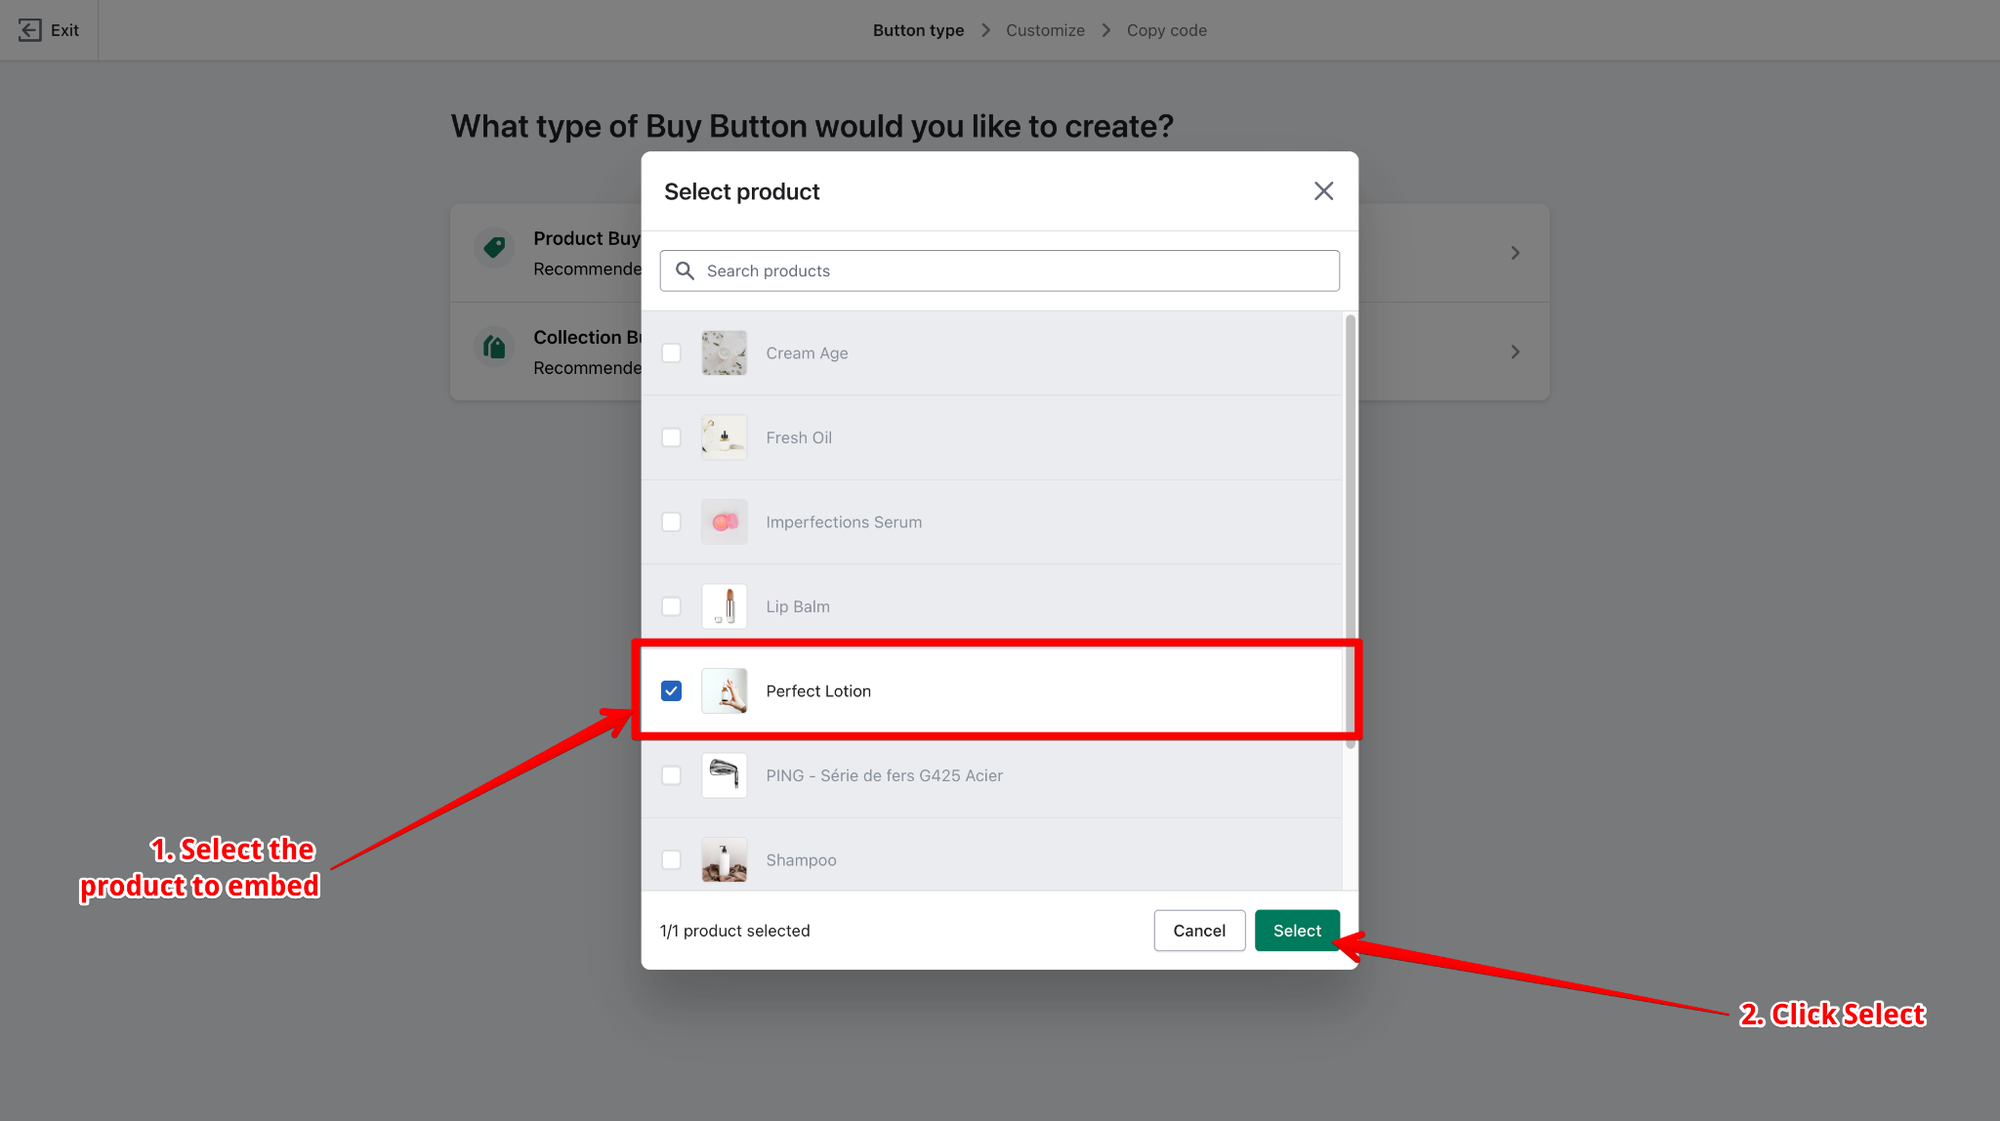
- Search the product you want to add to your blog and click on Select
- Customize the design of your embedded product and click Next
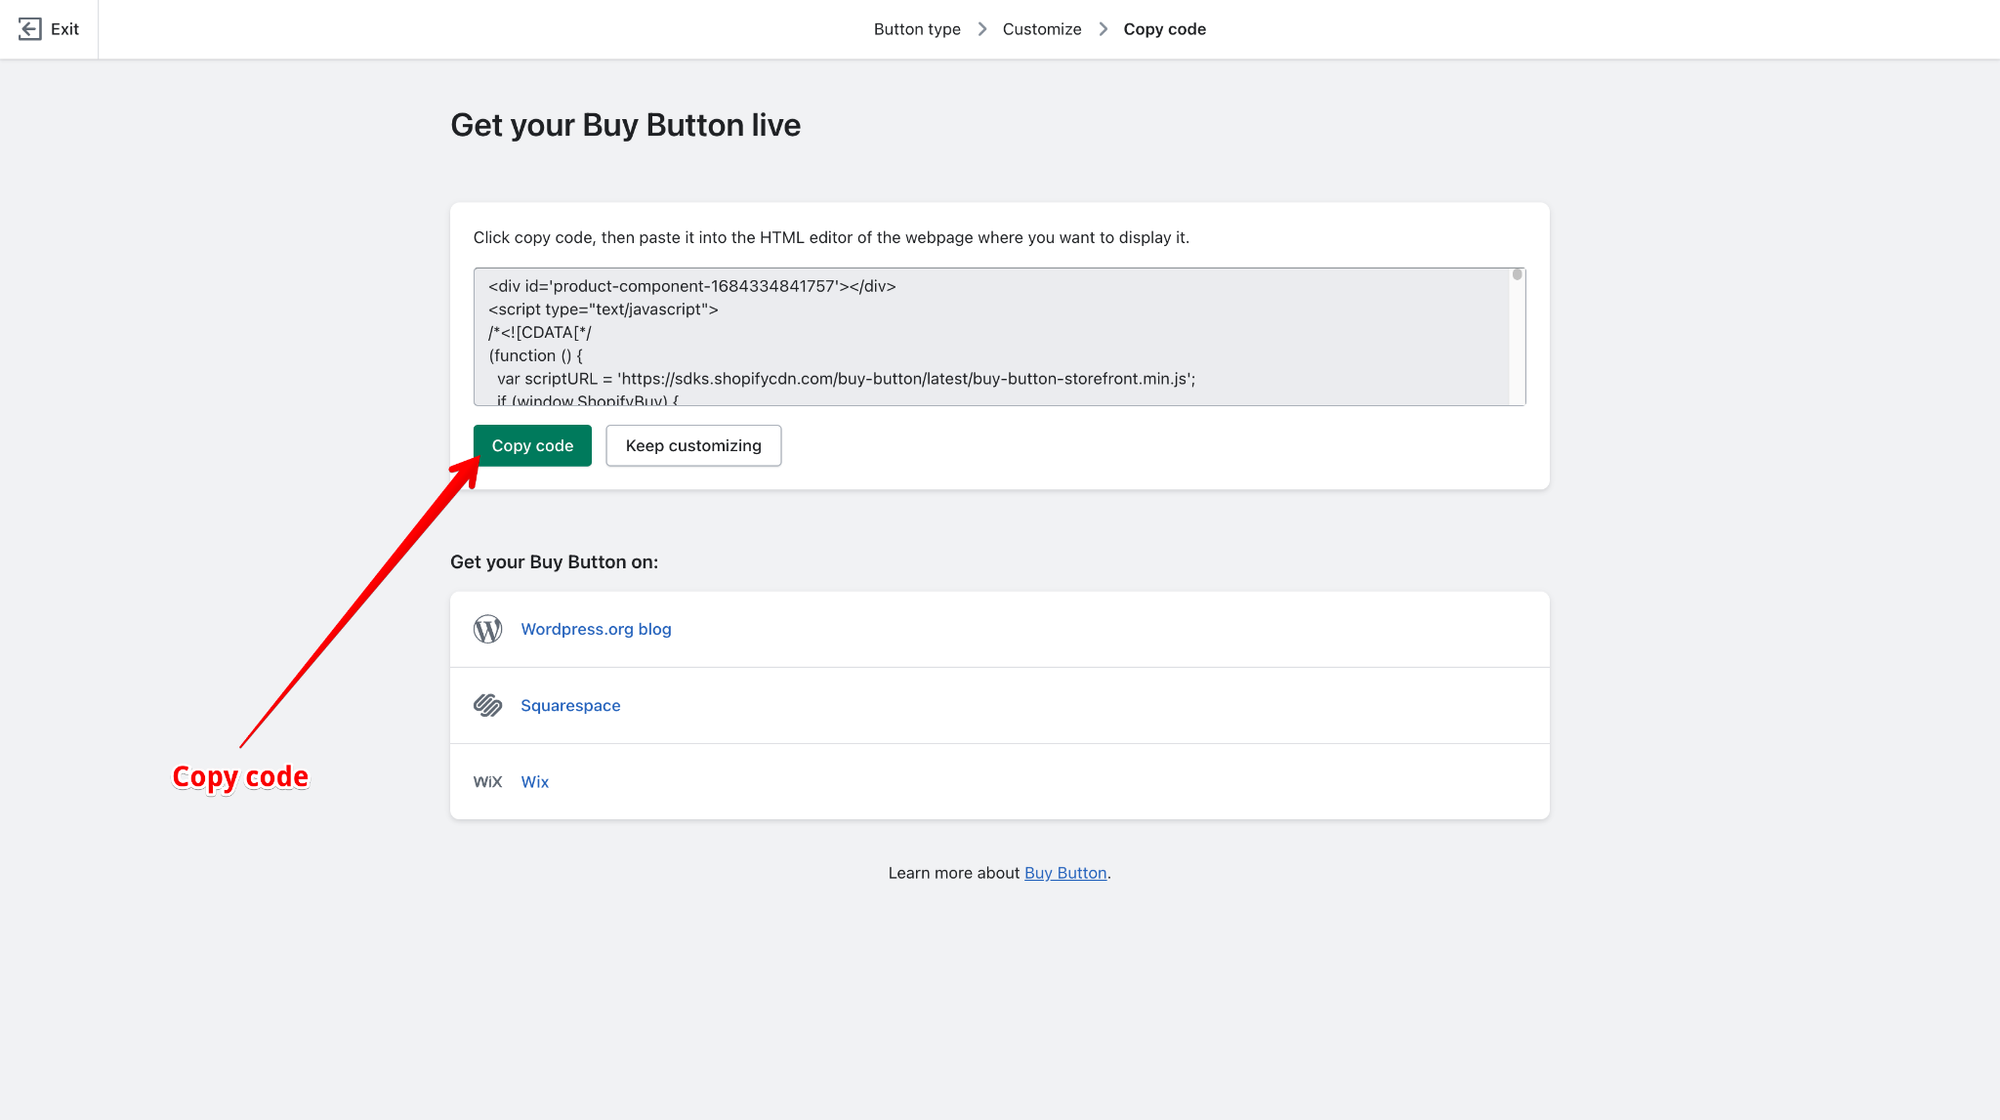
- Copy the HTML Code
- Go back in the blog post you want to add the product in -> Click on Show HTML -> Paste your HTML


Let's take a look at a real-life example

