We suggest using the default nameserver settings from your domain provider and only changing the DNS settings. Usually, most domains connect in one day, but sometimes it might take three days.
Only the person who owns the publication or the admin can set up a custom domain.
Step 1: Go to Publication Settings page
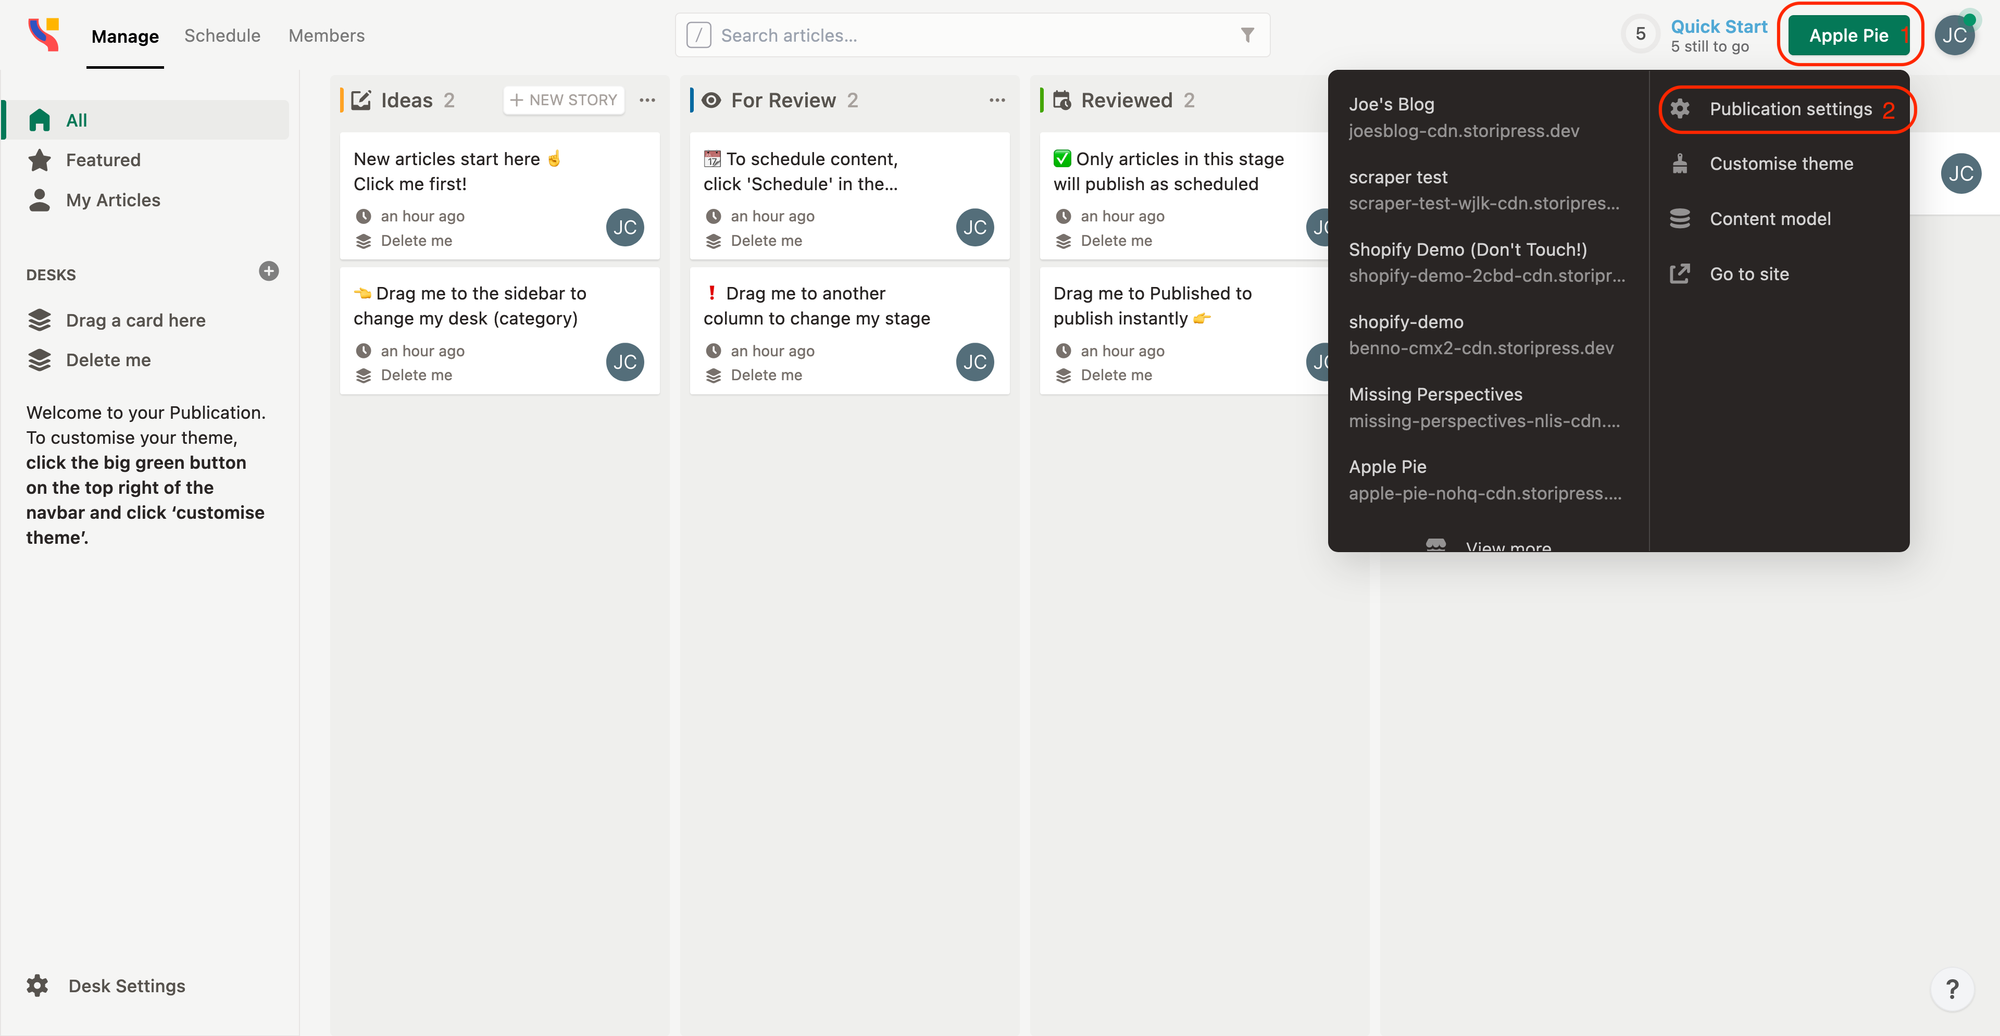
Publication Settings page through the menu dropdown list.Step 2: Navigate to the Custom Domain tab
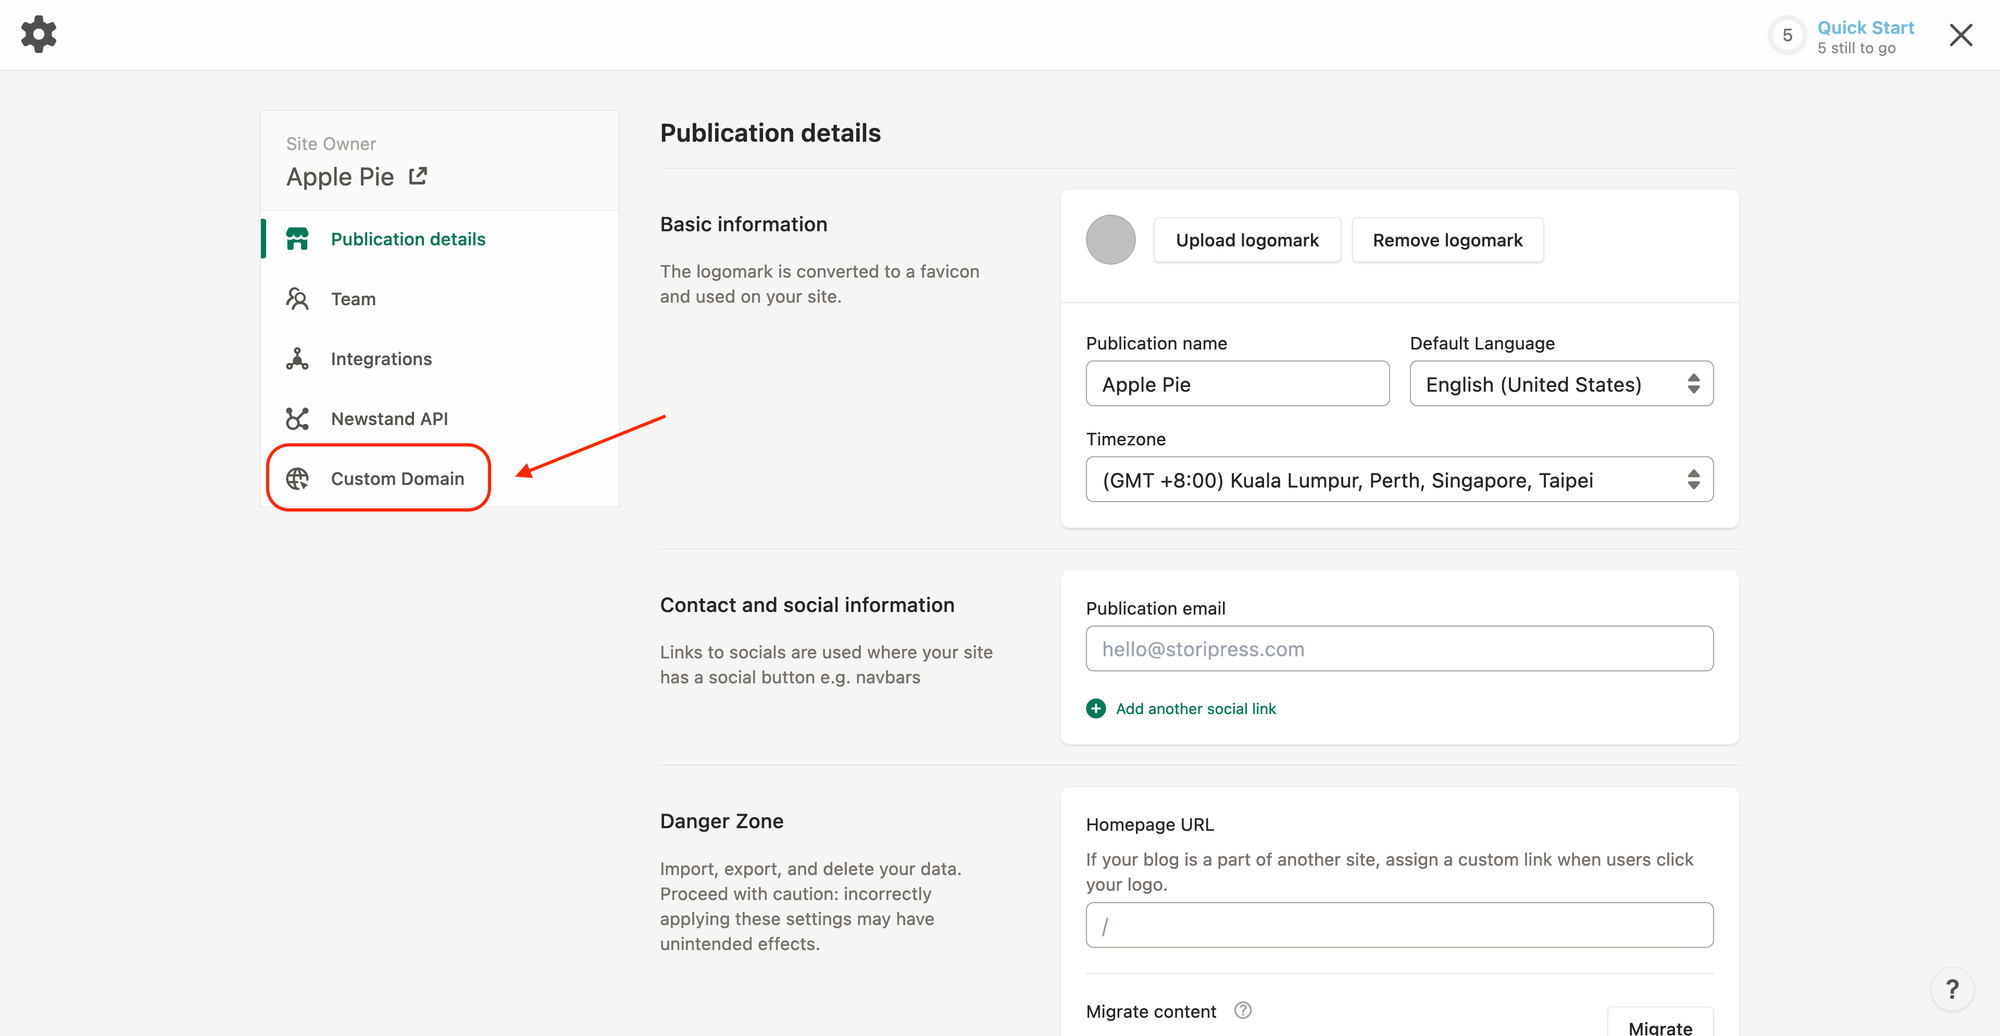
Custom Domain tab, please check if you have the correct permissions.Step 3: Enter the domain name you want to connect to get your DNS records
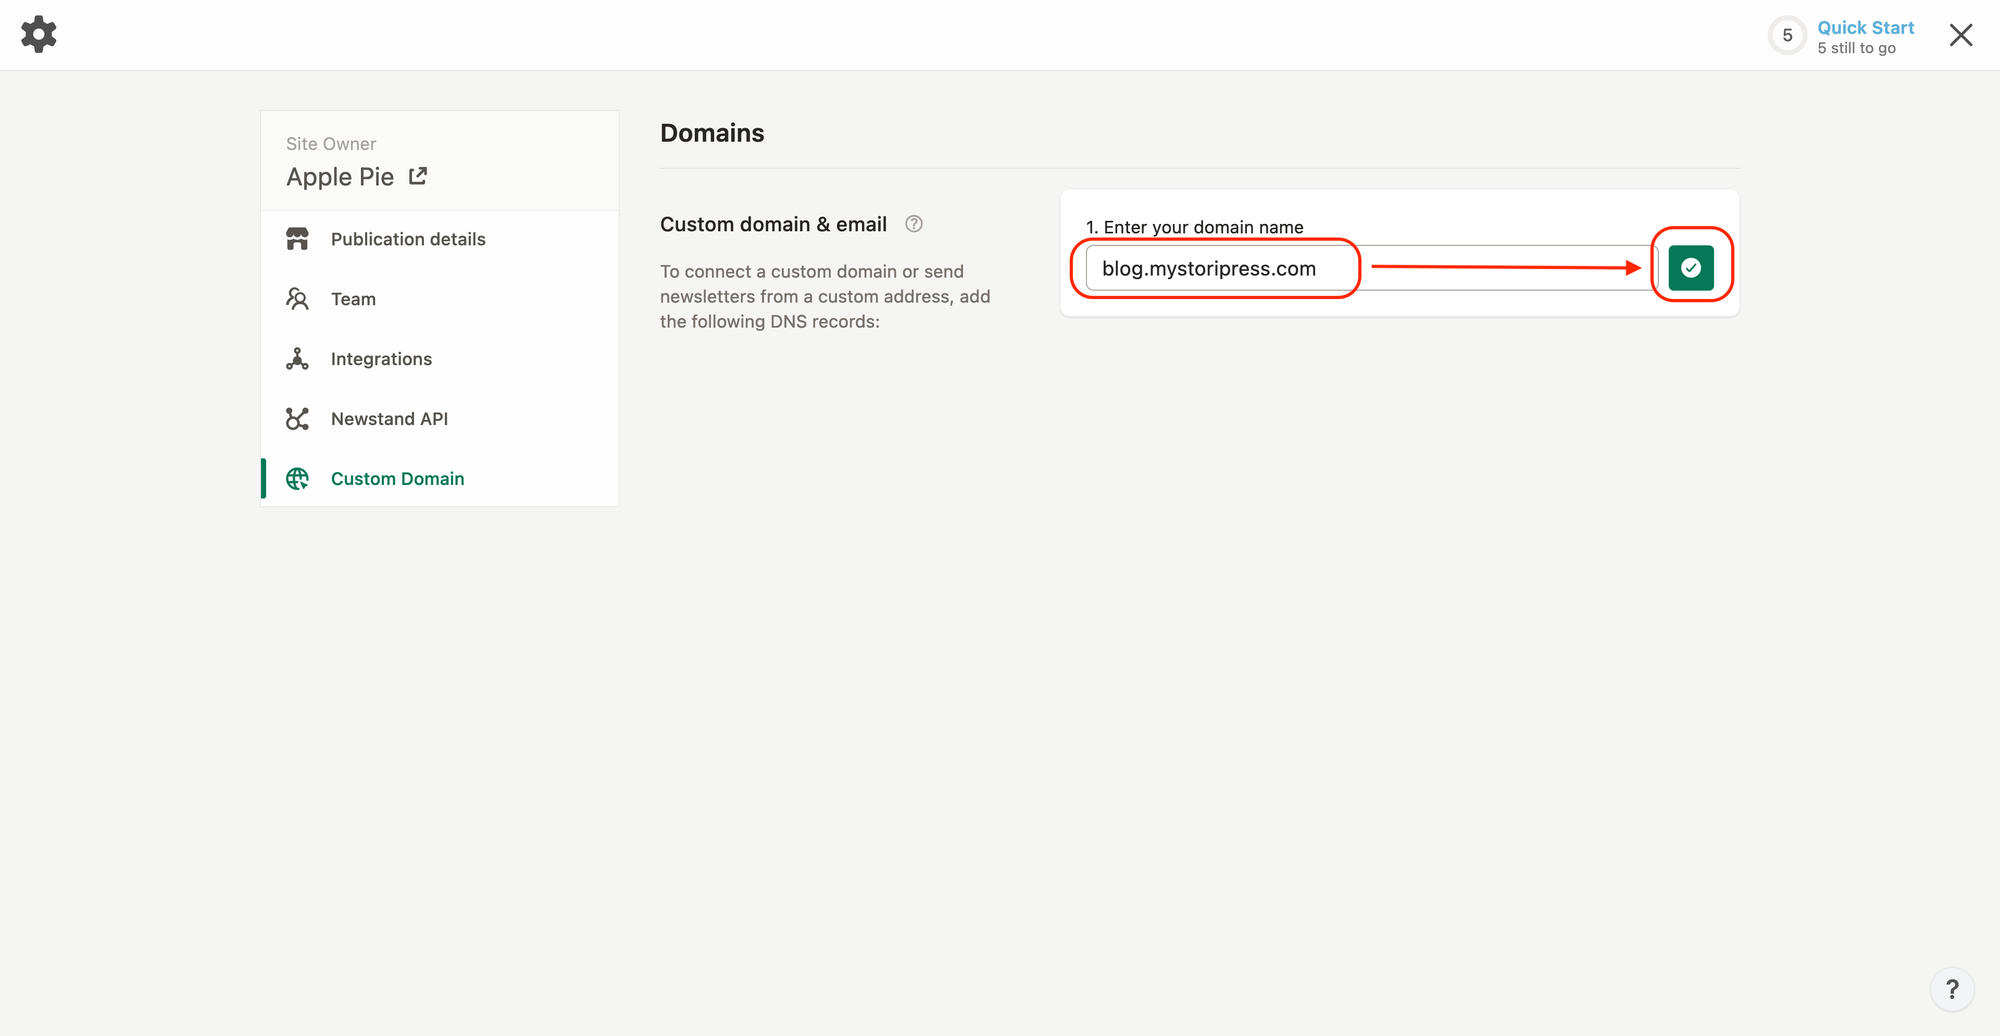
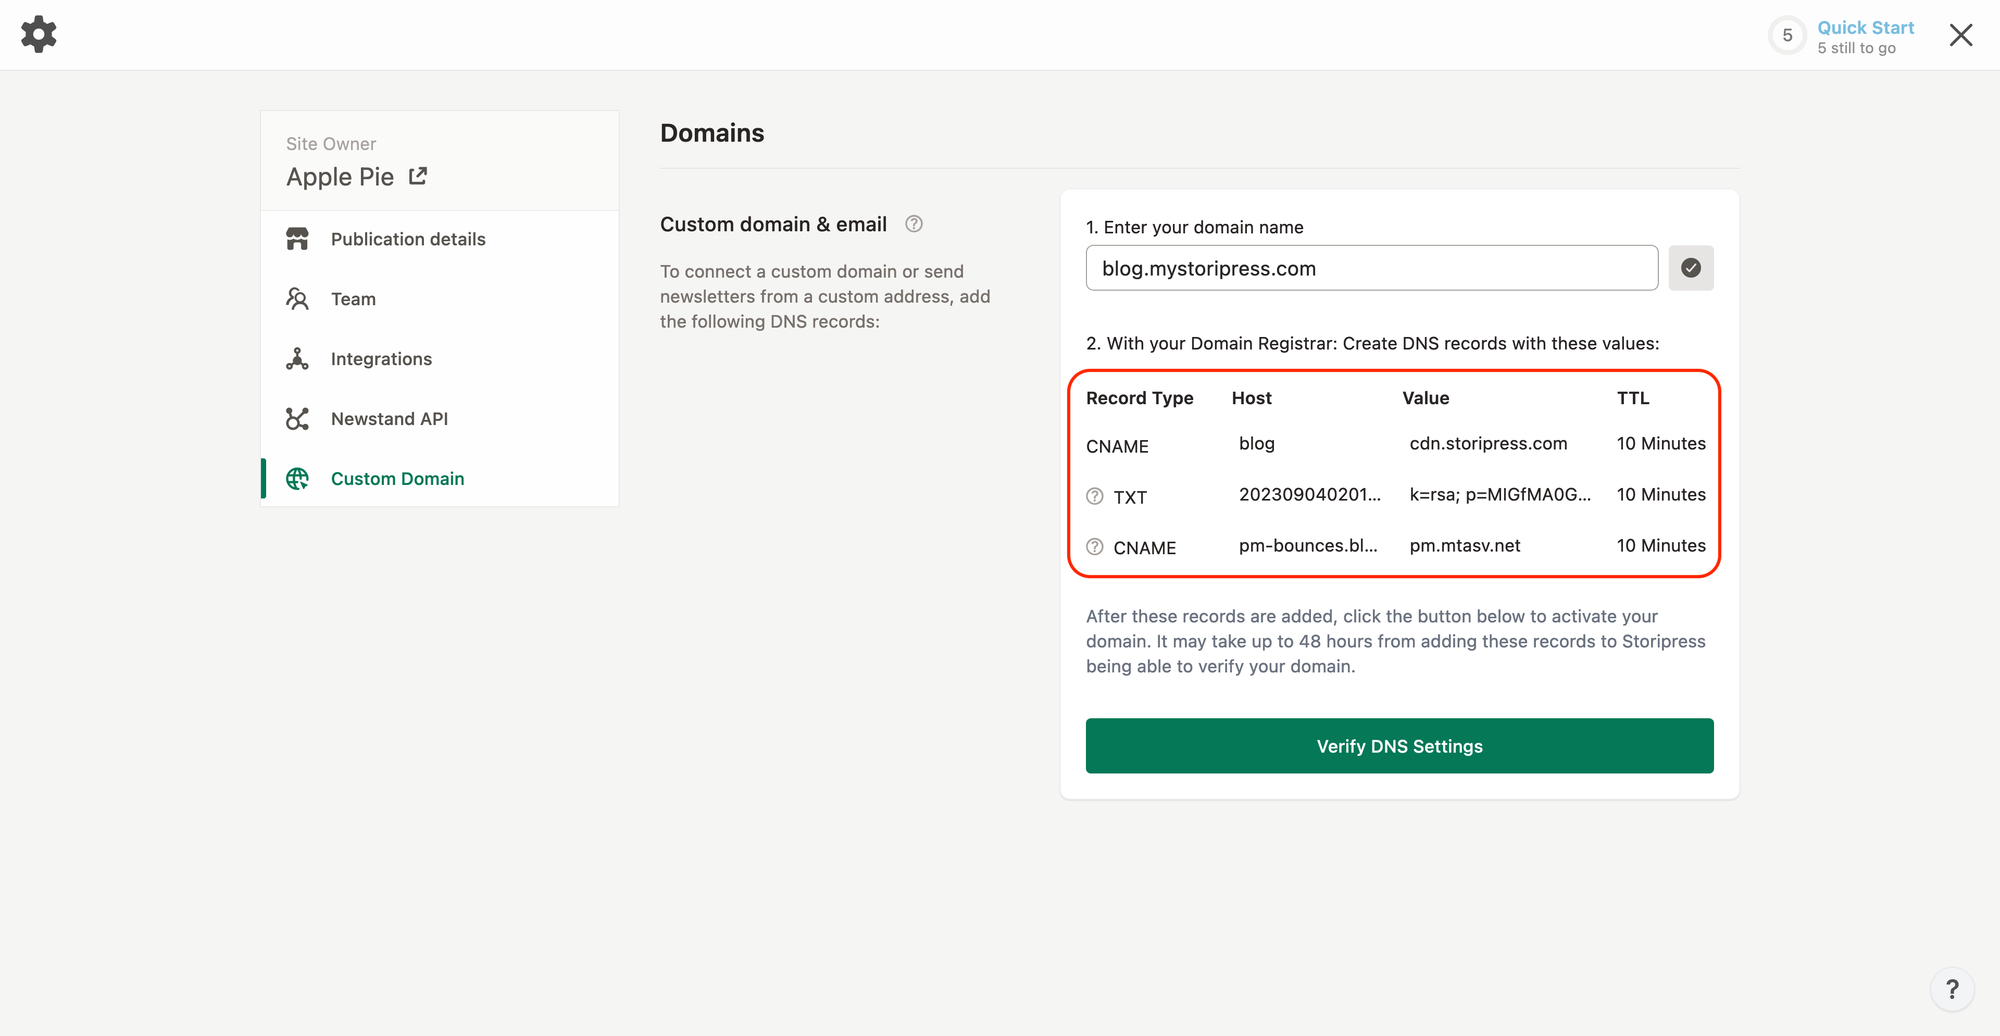
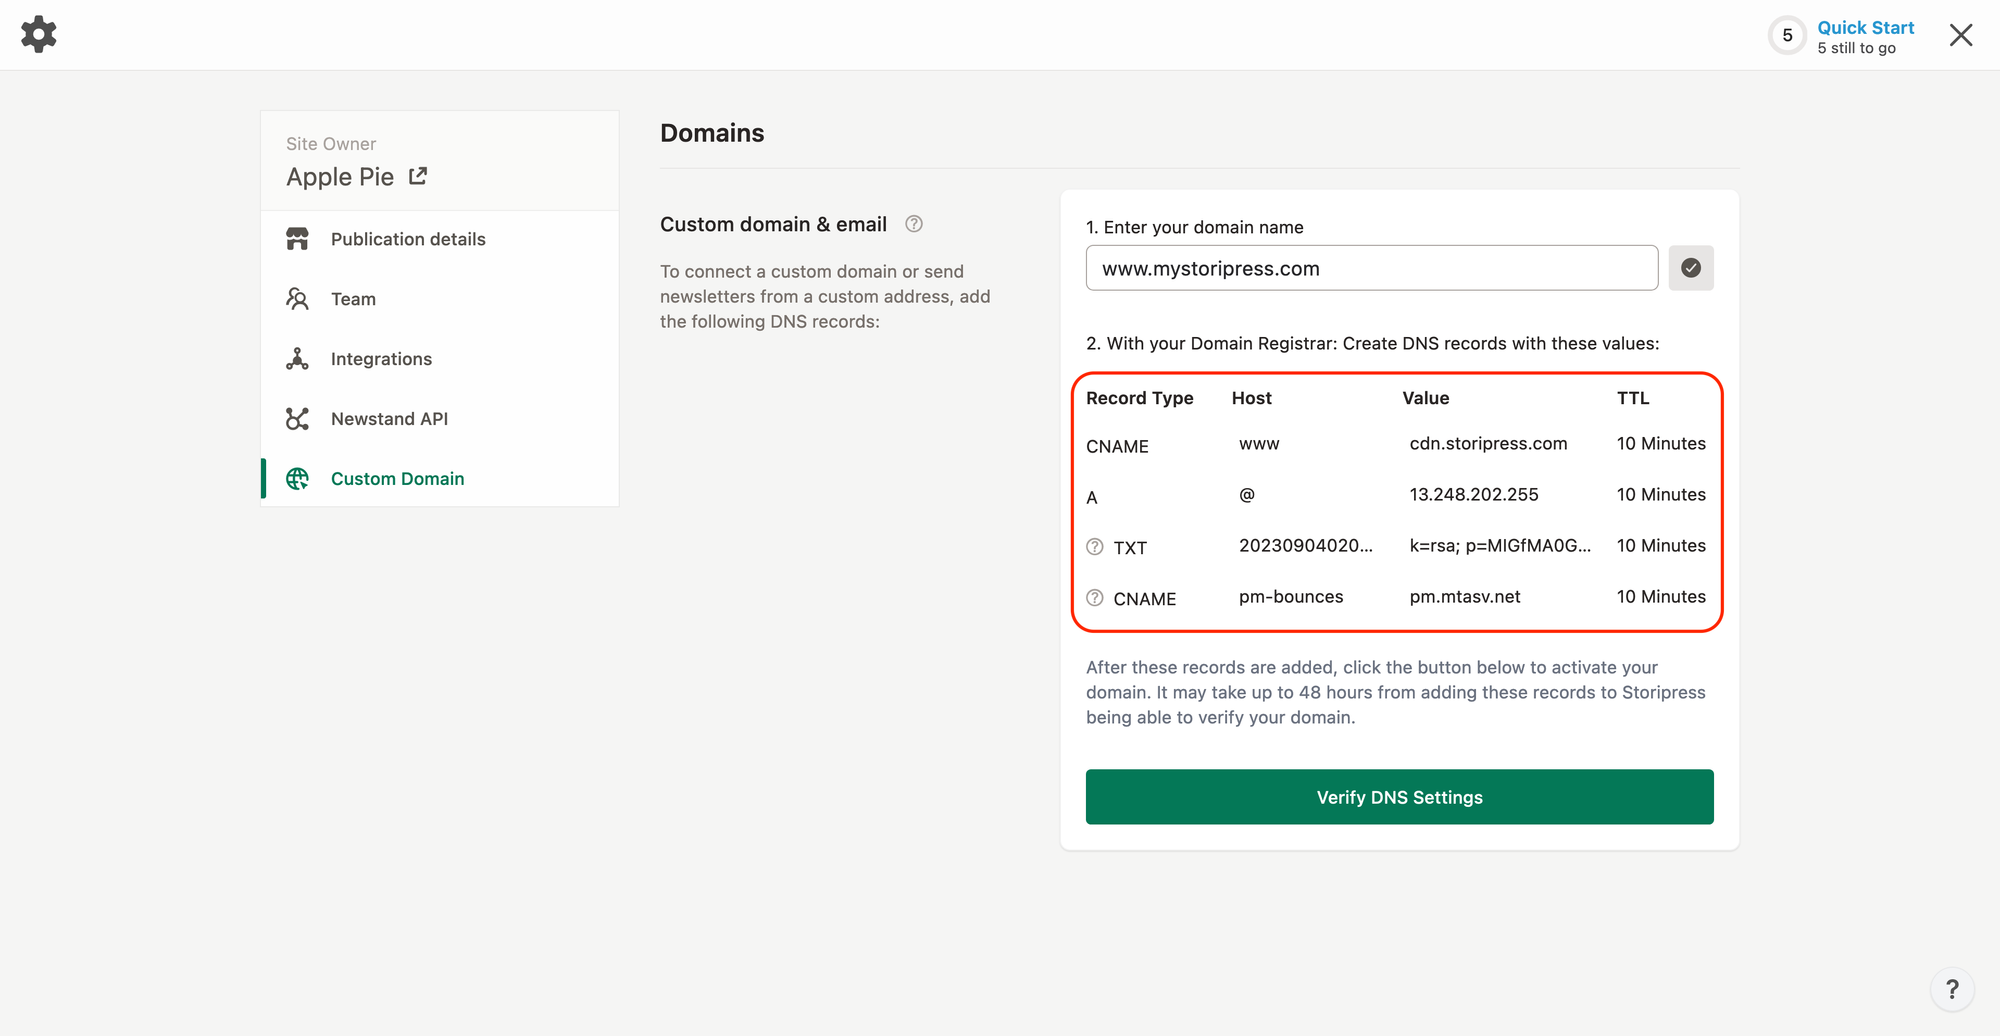
You will receive 3 or 4 DNS records depending on your domain name.
Step 4: Log into your domain account
Sign into your domain account and look for the part where you can change your DNS settings.
The place to change DNS settings might be called DNS, Advanced DNS Records, Manage Domains, or something like that, depending on who you use for your domain.
Step 5: Add the DNS records shown in step 3
If you already have some records with the same
Host name for the A and CNAME Record Type, delete them first. If you use a provider like GoDaddy, they might have Parked DNS records. You need to delete these before you add Storipress’ DNS records.
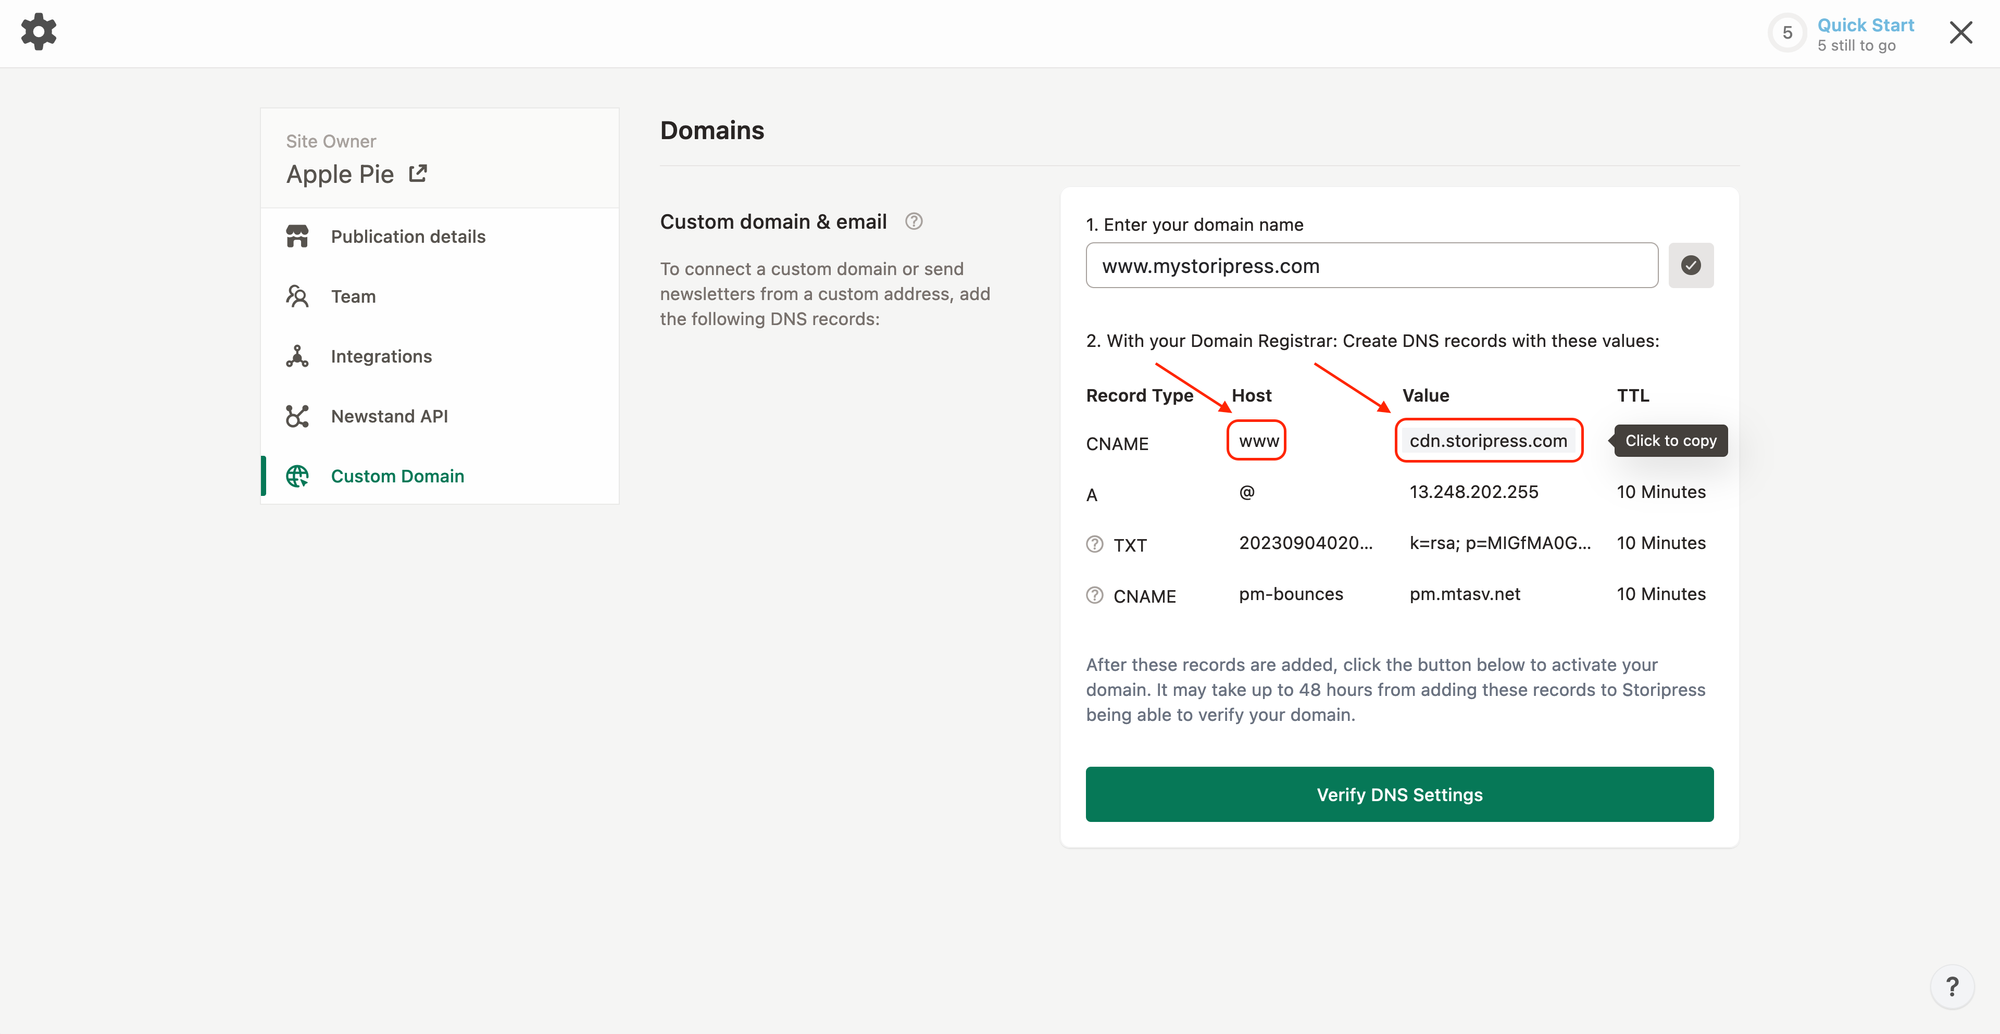
Host and Value to copy the value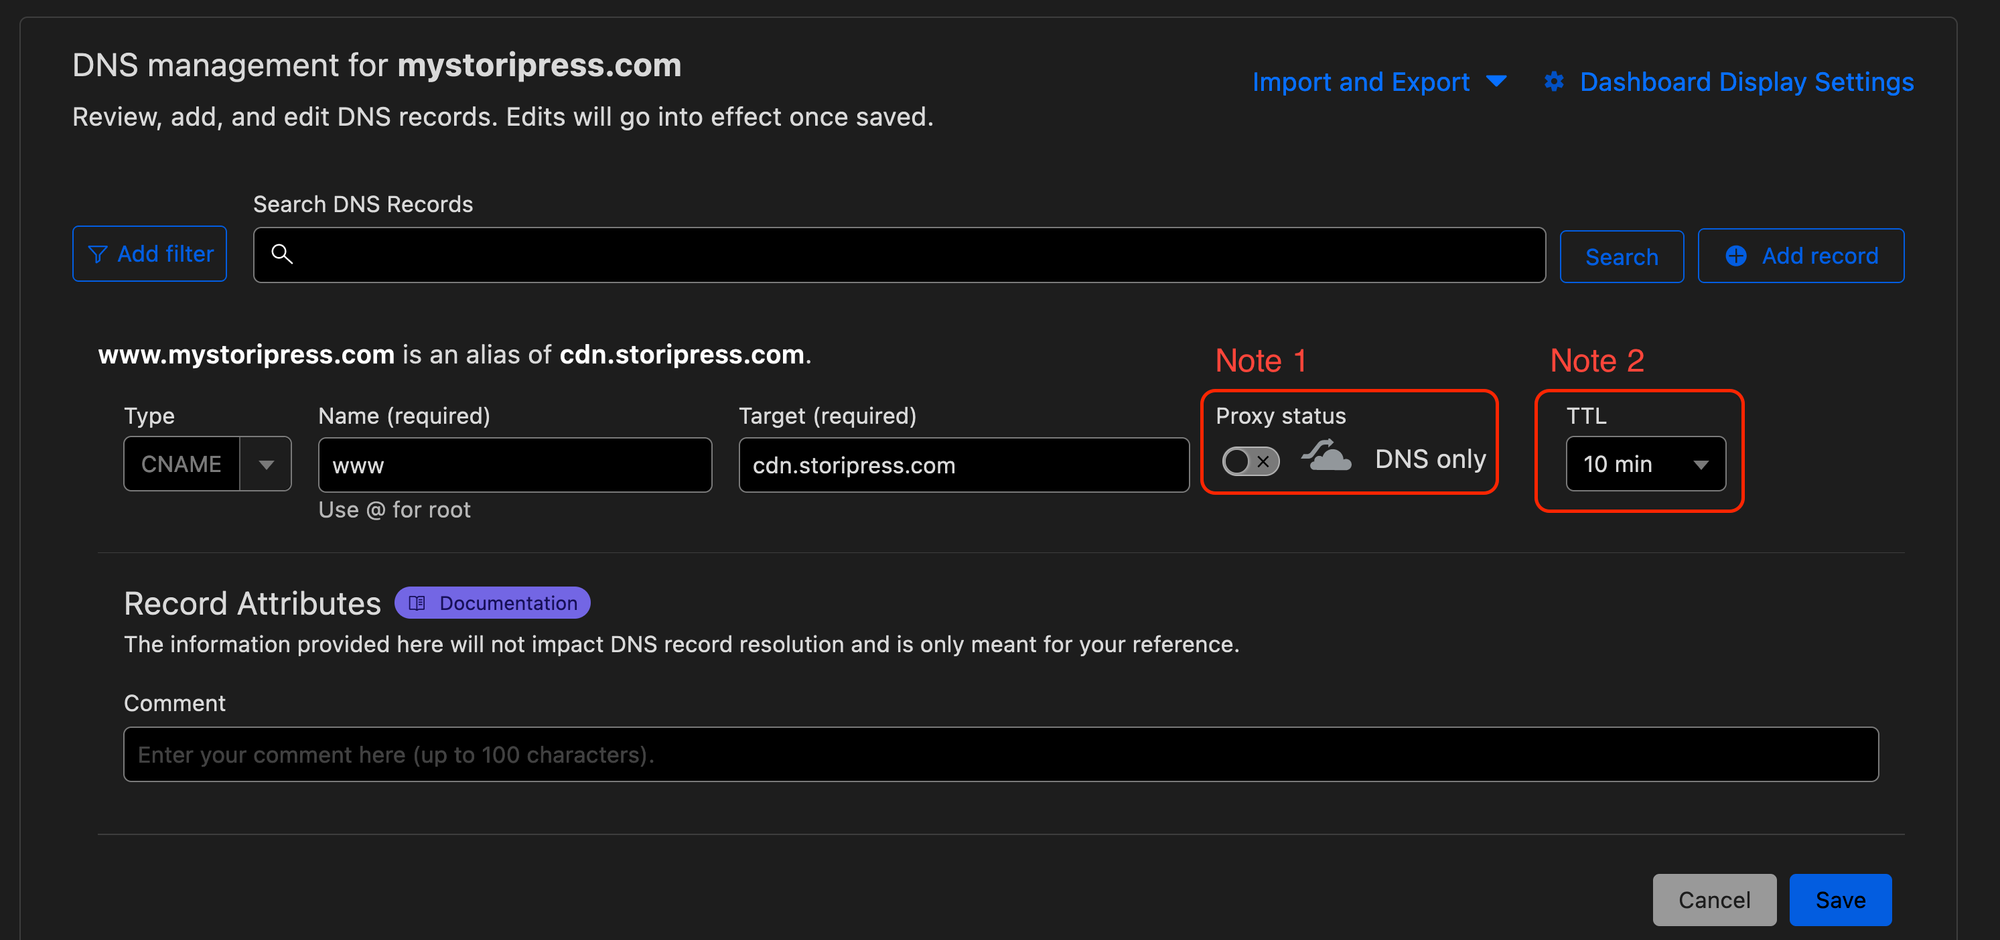
Type, Name(Host), and Value(Target)If your domain provider provides a
Proxy feature, you will need to disable it. If your domain provider does not provide a 10-minute TTL, choose the shortest one.
Step 6: Click Verify DNS Settings after all DNS records are added
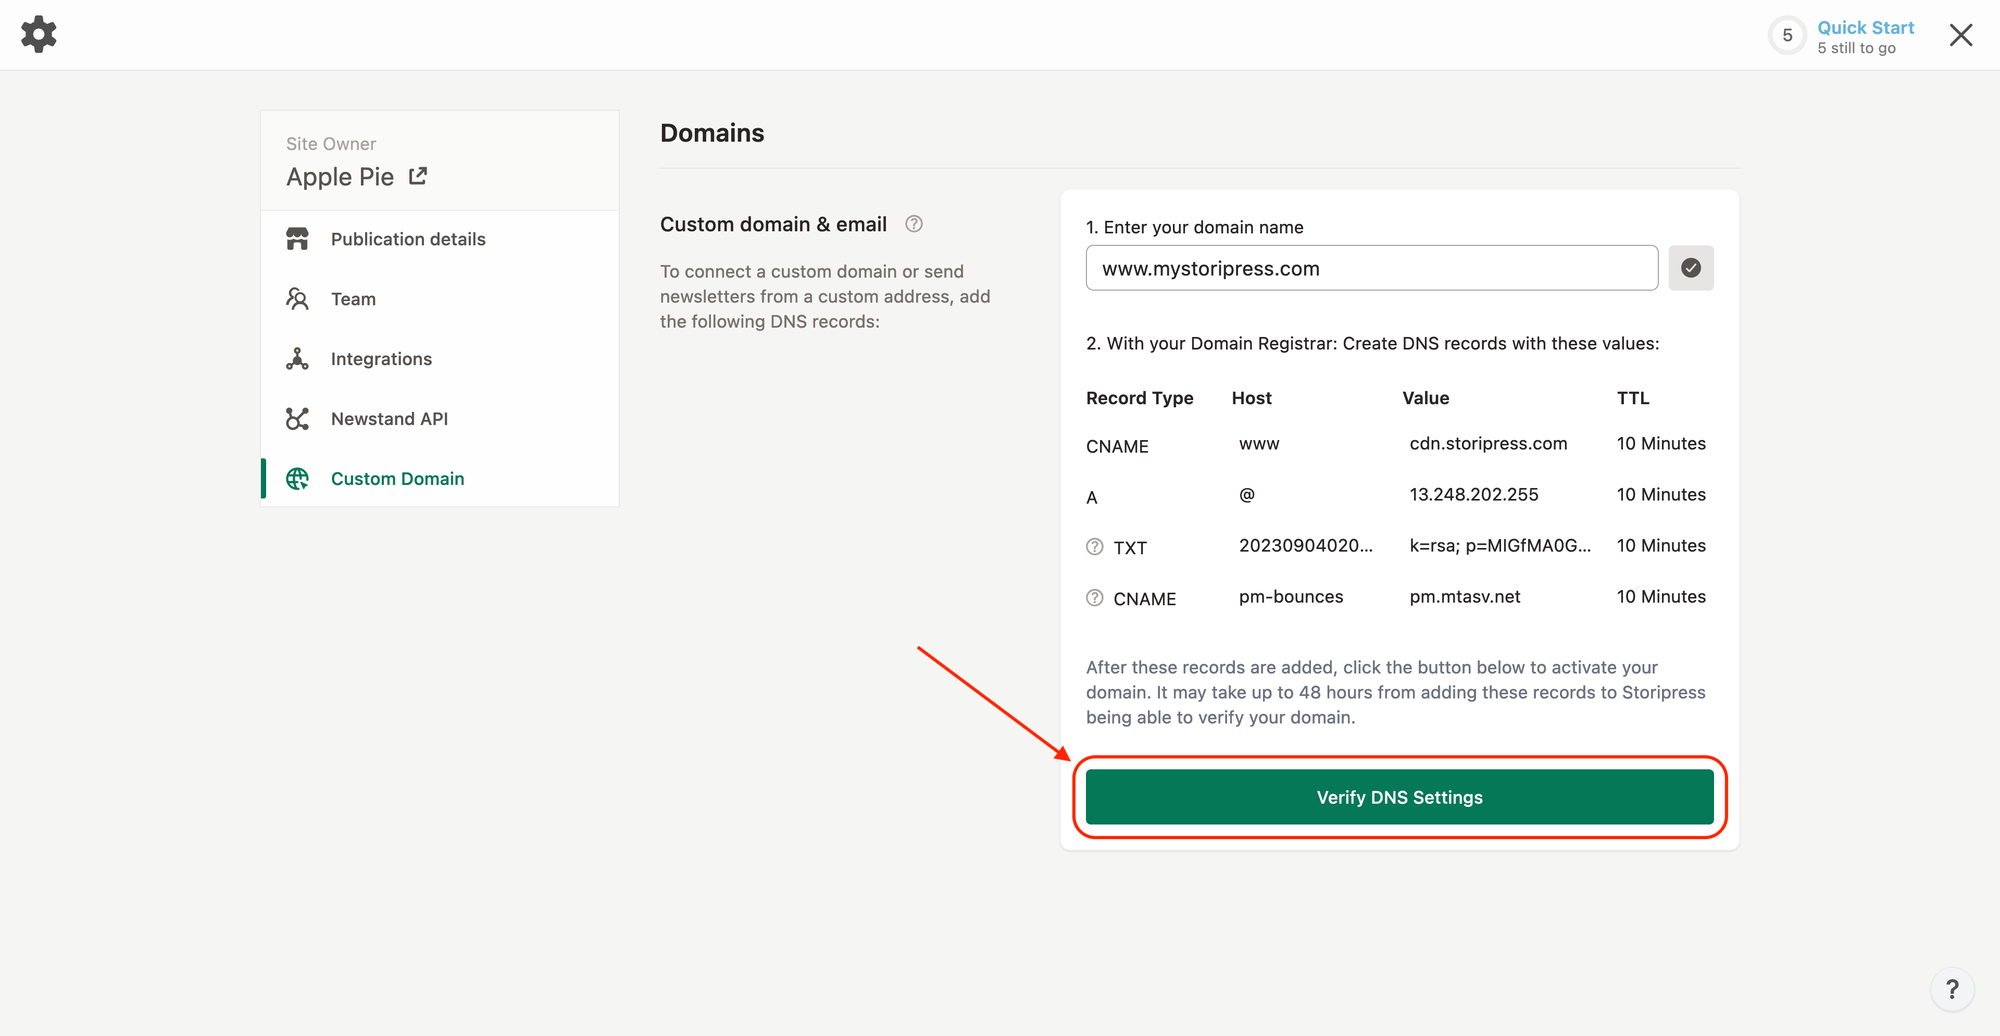
It might take a little while, maybe a few minutes or even hours, to check everything when you set up a custom domain, especially if you had existing records with the same
Type and Host before you set up the custom domain. When everything is set up correctly, you will see the following:
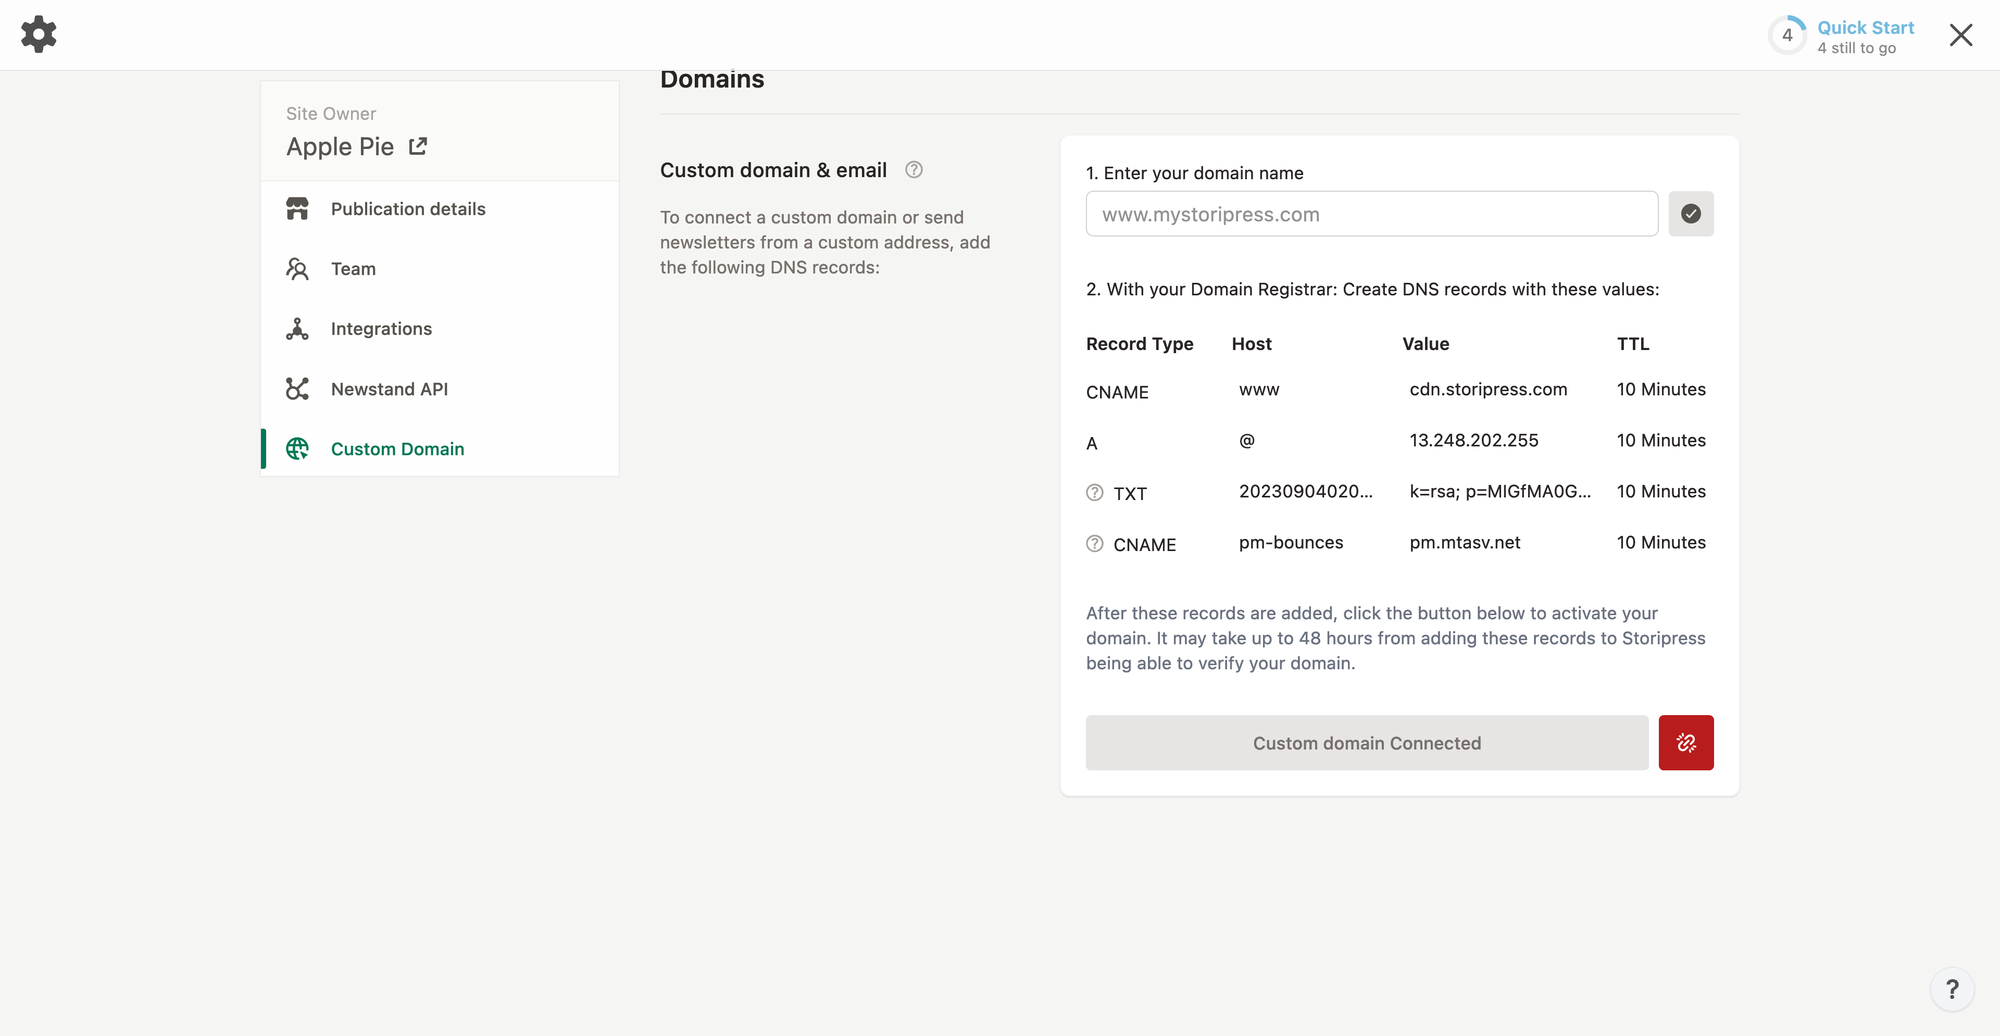
Your site will start working in a few minutes after the custom domain is ready. If you still see any mistakes after a whole day, just click the ❓ help button on the bottom right of the app or email support@storipress.com for help.
